Splitboard Bindings Made Easy: Your Guide to Transitions
Splitboard bindings make your backcountry snowboarding life much easier! They are lighter than your resort bindings but just as responsive, and Spark R & D splitboard bindings are easier than ever to transition from tour to ride mode which makes keeping up with your skier friends a little more manageable!
The perfect quiver – Spark R&D bindings and Weston Splitboards
The Weston Backwoods & Eclipse Splitboards are the perfect boards to pair with either the Spark Arc or Surge splitboard binding. With their freeride versatility you can take these boards from wide-open bowls to the tightest trees. These boards will keep you on top during the deepest days and are stiff enough to get an edge in through the changing conditions between storms!
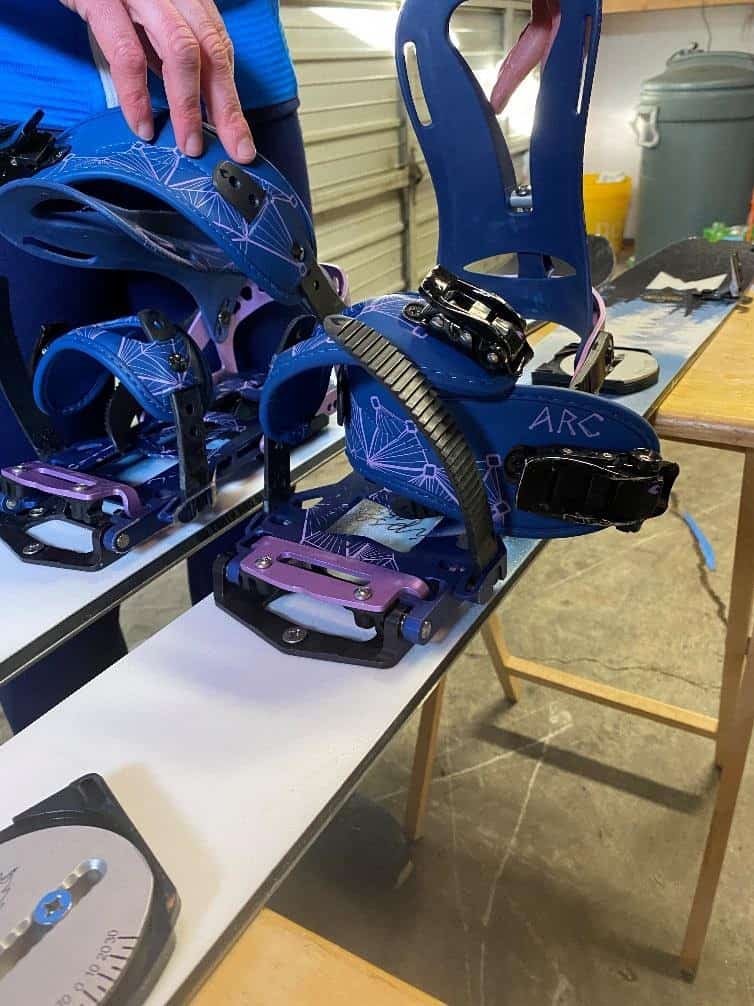
Here’s why we love Spark R&D spliboard bindings (especially the Surge and Arc):
- Easy to use: Spark R&D Surge and Arc bindings are both super easy to use and come down to slight differences in performance.
- Performance options for every rider: The Surge is a stiffer binding which makes it perfect for the aggressive rider seeking out big lines, while the Arc is lighter weight with a medium flex making it a great option for those longer tour days.
- Smooth transitions: Both bindings use the Tesla T1 binding technology which allows for quick and smooth transitioning.
- Durability: Spark R&D doesn’t cut any corners in using ultra-durable materials to maintain strength and performance. Using thermoplastics in the ladders and buckles, CNC machines to cut the Arc baseplate, and glass fiber in the highbacks, these bindings are built to last!
How to use Spark R&D Splitboard Bindings
Watch the video below to learn the quick and easy way to set up your splitboard bindings for tour mode and ride mode. Then keep reading for more details as we break down each step.
How to set up splitboard bindings for tour mode
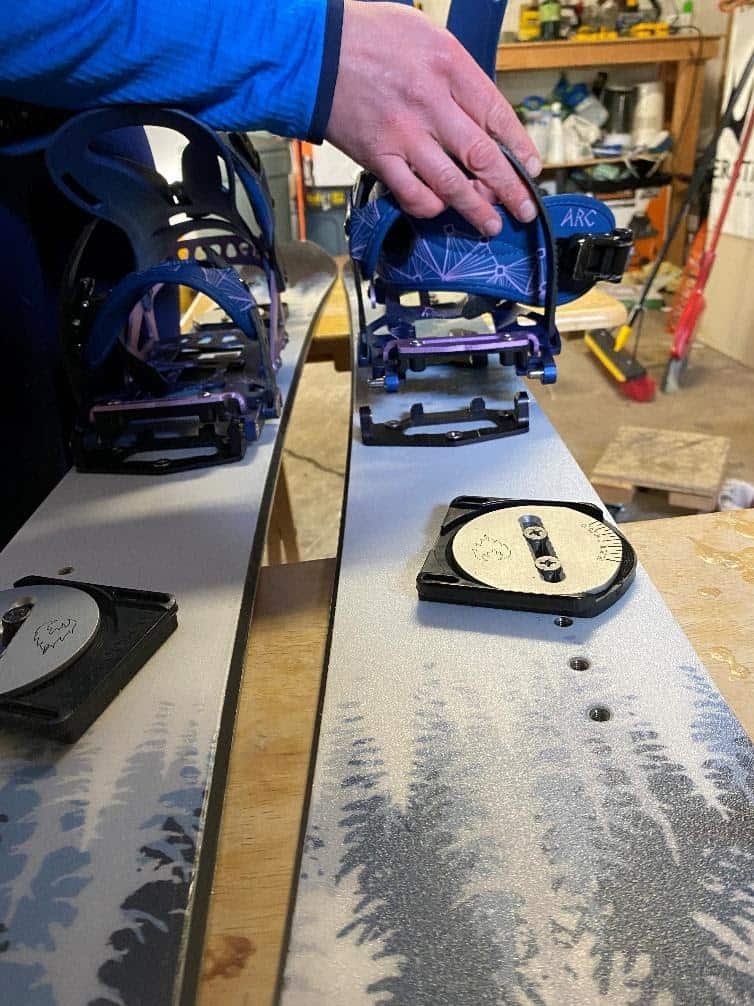
- Lift the toe ramp, grab the heel cup of the binding, and slide them off the pucks.
- Unhook the tail and nose clips, and any clips you may have in the center of the board, and separate your board into the two skis.
- Position the long, straight, edge to the outside.
- Grab your bindings making sure the buckles are on the outside (same side as that long, straight, edge), line the pins on the binding up with the holes on the toe bracket then press the toe ramp down to lock.
How to set up splitboard bindings for ride mode
The uphill is done! Now it’s time for the fun part. Here’s how to transition to ride mode when you’re ready to shred.
First, you’ll have to put your board back together. Start by taking your skins off and storing them away in your pack. Remember, our split skis don’t have brakes so set them down in a safe place where they won’t slide down the hill! After you’ve taken your skins off pop the bindings off one at a time, then put the board back together making sure every clip is fastened.
Next, simply lift the toe ramp at the front of the binding up, then slide the bindings onto the pucks. Once the bindings are on the pucks press that toe ramp back down to lock the bindings into place then flip the forward lean adjuster down.
Lastly, strap in and you are ready to ride!


3 Tips for the best mobility, comfort, and efficiency
Having comfortable and efficient gear helps conserve energy and keeps our bodies from being beaten up before we even make it to the top. Here are a couple of tips to make your time skinning a little more enjoyable.
- Flip the forward lean adjuster on the hi-back up to allow for more mobility while climbing and remember, you have two settings with your climbing bars to get up that steep stuff, use them!
- Get custom footbeds to keep your feet comfy & happy. Not sure what they are? Read the Ultimate Guide.
- Keep your liners snug to avoid blisters, but don’t be afraid to loosen your shell a bit. Check out this splitboard specific boot we recommend.


Still not sure about investing in a pair yourself?
We have a full demo fleet of Weston splitboards equipped with Spark R & D Arc bindings for your test riding pleasure! Know what you want to try? Use this link to reserve your rental ahead of time online. If you’re not sure what setup would be best for you, stop by and our gear experts will help you figure it out.
And by the way, did you know that you can apply up to $150 of rental credit towards a new splitboard package of your own?
Ultimately, it will take time to get your transitioning speed down but being familiar with your gear before you go out is key! Take a few practice runs at home to make sure you feel comfortable with it and know how things should look and feel. Keep a binding tool in your kit to make minor adjustments on the fly and check your equipment every time you head out!
Shred on!
*Featured photo by Annie Koch Photography
Share this
Popular posts


Leave a comment